This easy DIY Easter cake topper will be the star of your Easter table. With just some felt and your glue gun you can make this easy Easter cake decoration.
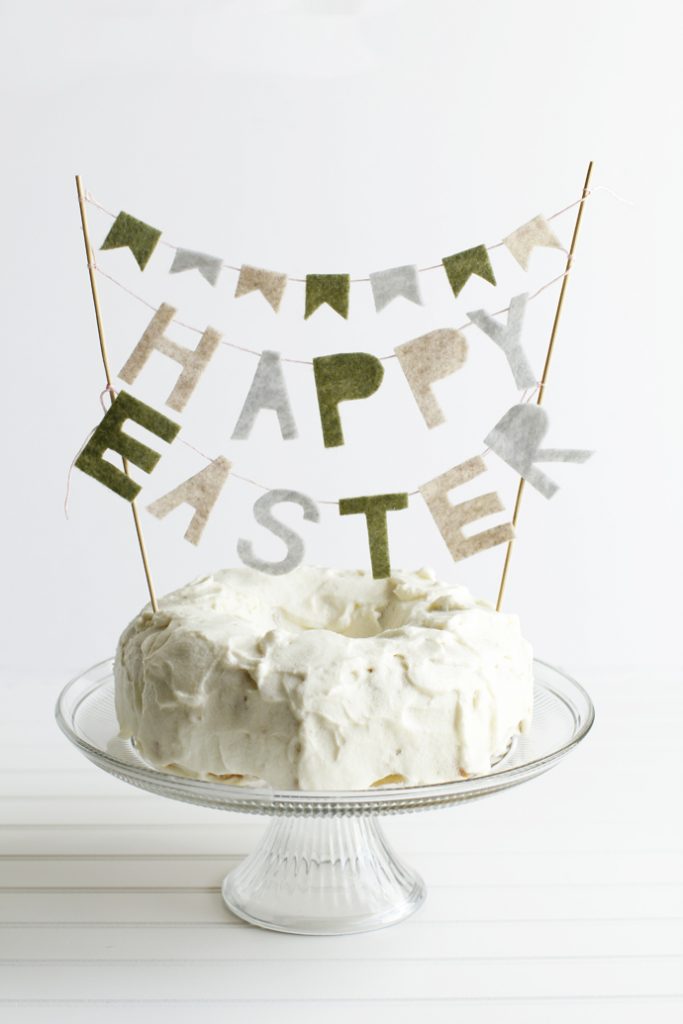
I should begin by admitting that I have an addiction to baked-goods accessorizing. It’s true…I can’t whip up a batch of cupcakes without throwing some sprinkles on there.
Making a cake? I have to add ribbons glues to toothpicks because, like I said, I have an accessorizing problem.
So when you combine the delicious decorating potential of a cake with a holiday, you know there will be some cake-topper magic in the works!
For Easter I came up with a no-sew (you heard me) cake topper that is so easy, the Easter bunny could figure it out. All you need is a little Easter spirit (like Christmas spirit but it smells like eggs and chocolate…mmm).
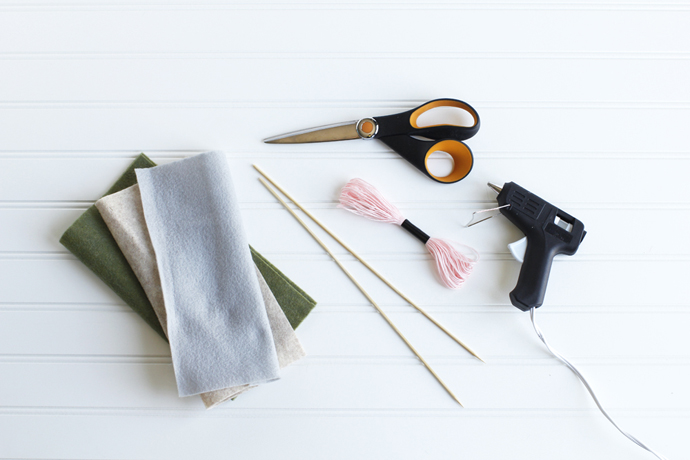
Easter Cake Topper Supplies:
- PIeces of felt in spring colors
- Embroidery string in spring colors
- Two kabob or skewer sticks
- Fabric Scissors
- Hot glue gun with glue sticks
How To Make This DIY Easter Cake Topper – Step By Step
Step 1: Cutting Out Felt
I began my Easter cake topper by cutting out felt rectangles at 1.5″ wide by 2″ tall. I cut out one rectangle per letter, which is 11 rectangles if you want to say “Happy Easter” and it would be 11 rectangles if you wanted to say “Happy Spring” and it would be 21 rectangles if you wanted to say “I am a Jehovah’s Witnesses” (just a little DIY
comedy for you).
Step 2: Turning Squares Into Letters
This step is probably the trickiest step, but I found that if I just took it slow and was thoughtful about the cuts I made the letters turned out great. For step 2 grab your scissors and a felt rectangle to create a mini felt letter. You will do this by cutting away the negative space around the letter. It helps if you use the sides of the rectangle as the boarders of the letter. For example, I pictured the two sides of my rectangle as the vertical sides of my letter. Then I simply cut out the top and bottom squares that are the negative space in the letter.
Step 3: Attaching Letters To String
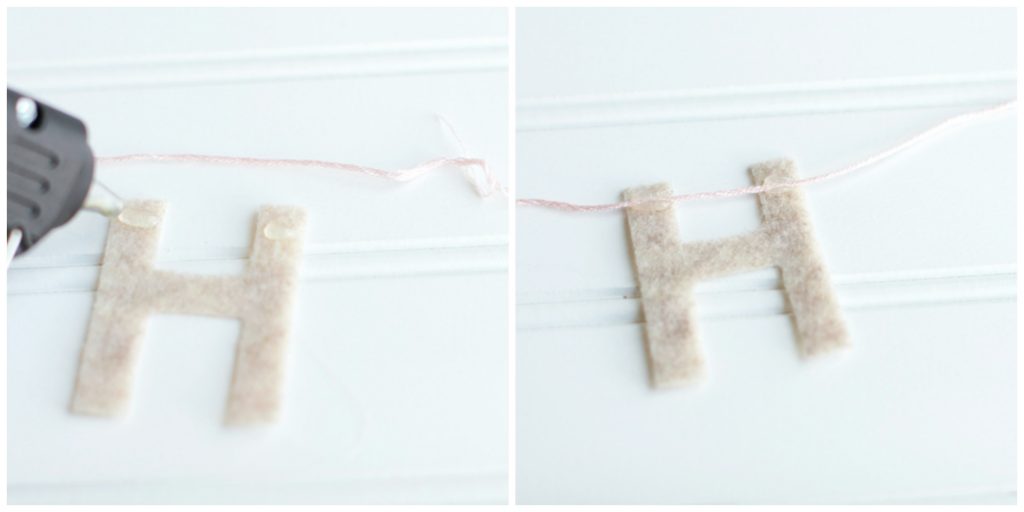
Now comes the no-sew part (party!). For step three you will be attaching the felt letters to the embroidery string. I began by turning my word upside-down and backwards. That way I would glue it together in the correct order/direction when I flipped it around. Next, I took my first letter and applied hot glue to the top parts of my
letter (for the “H” it was the top of the two vertical lines). Make sure you are gluing the back of your letter to the string. Repeat this for all your letters with each word on it’s own string.
Side note: I spaced my letters about ¼″ apart. I also threw together a little bunting banner for the fun of it.
Step 4: Finish The Banner
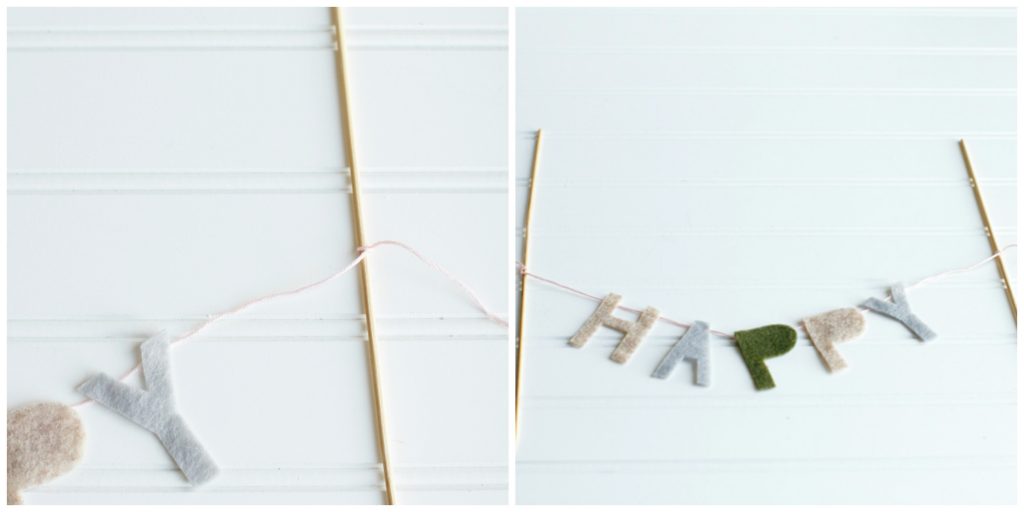
For the final step (woop woop!) you will simply flip around your glued words so they are facing right-side-up and tie the two string ends to your skewer sticks (one string end to each stick) creating a little banner! I did a three-tiered banner with tier one being a bunting banner, tier two as “Happy” and tier three as “Easter”.
Stick it in your cake and you are done! One cake banner fit for Easter! And now my addiction has been appeased.
More Easter Resources To Try
If you are in need of more Easter resources, or some great recipes to serve for Easter breakfast or brunch check out the posts below.





Leave a Comment