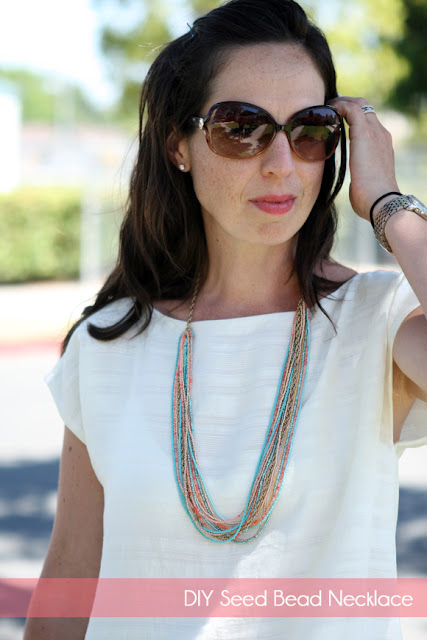
This DIY project went through a few transformations before I finally settled on this particular design, and I have to say I love the way it came out. My original intent was for it to just be a plain clustered necklace that was much shorter in length, lying closer to my collarbone. But the more I worked with it, the more it just felt a little too mature. I tried braiding it, and while it looked cool, it also looked too young, almost bordering on tweenish. Finally this morning, it came to me to attach it to an existing old necklace I had on hand that was missing its pendant, and leave it as a simple long draped necklace. So while this necklace really only took about 4-6 hours to make, it took over 4 weeks for me to finally settle on a design I loved.
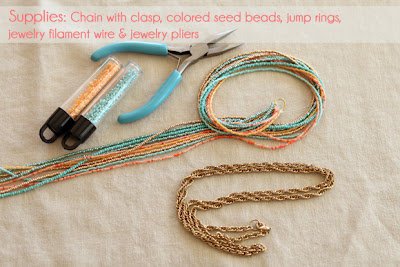
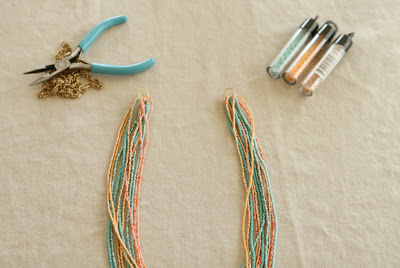
For this project you’ll need the following, as well as a steady hand and just a bit of patience. Stringing seed beads is tedious, yet strangely very therapeutic work. I string a little at a time, usually in front of the TV at night and stop when my fingers get tired.
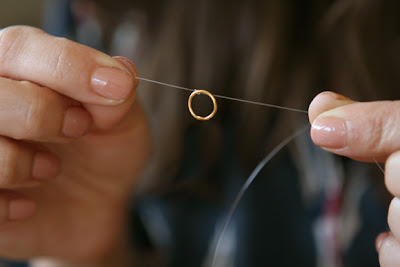
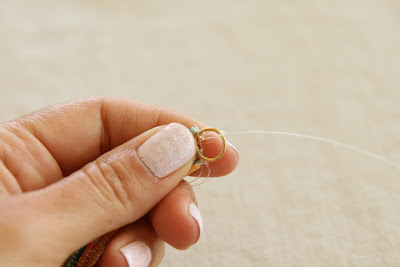
Start by double knotting the filament wire around the jump ring like so{*Please see updated post on how to properly tie off strung seed beads using crimp beads}
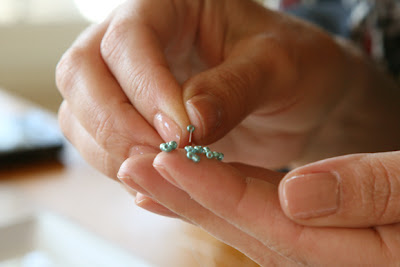
And then you just start threading your beads. There are tools that work like channels that help you string your beads more quickly, but I just do it the old-fashioned way.
A little trick I have is to pour out some beads on a flat surface, and then lightly moisten my finger tip with my tongue so the beads can easily stick to my finger, and then pick them up one by one, maneuvering the filament wire to easily pick up each bead. Sounds weird and kinda gross, but it’s an effective technique.
Once you complete a row of beads, double knot the end so they don’t slip off, and make another row.
My necklace has 12 rows of seed beads, but you can add as little or as much as you’d like.
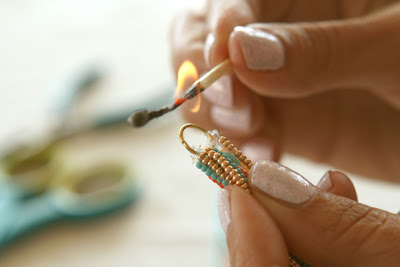
Once you’ve completed your rows, a little trick I have is to very carefully burn the edges of the filament wire so the messy little stragglers sort of melt into each other, giving it a cleaner finished look, as well as better securing the ends so they don’t come untied, which has happened to me before. It’s heartbreaking when a row of beads comes falling to the ground.
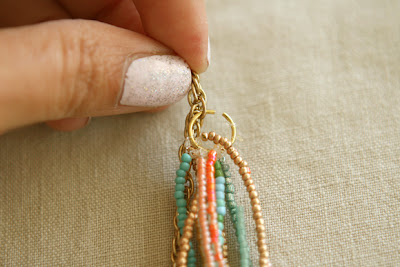
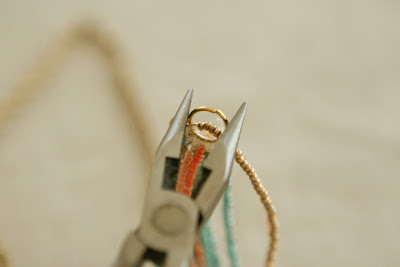
Attach the completed rows of beads to another jump ring at the other end, and singe those ends as well.
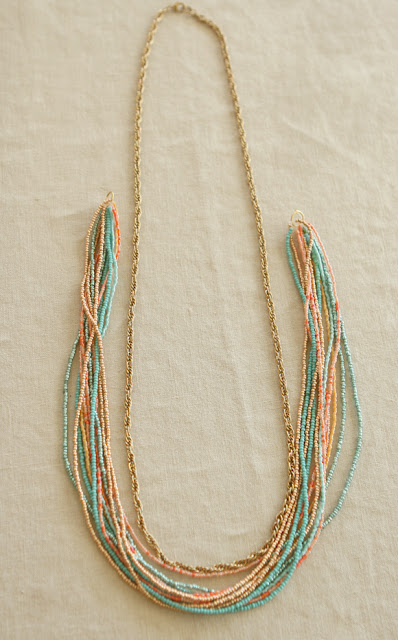
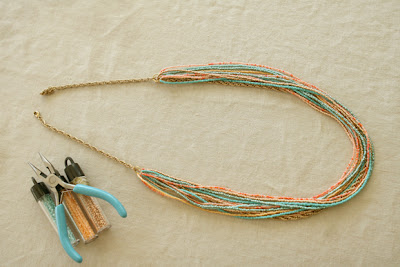
Line your row of beads up to your chain necklace and figure out where you want to attach the beads. The chain was already the perfect length, so I went ahead and figured I’d attach the beads 6″ down from the opening on each side.
I love the way the chain adds a bit of texture and dimension to the beads. Originally I was going to cut the chain and attach just the upper half of the chain to the beads, but attaching the beads directly on to the chain adds depth and eliminates another step!
A note about the ends. They don’t look perfect I will admit. There are tiny bits of the filament wire sticking out, but since it’s clear no one really notices at all. If you’re really wanting a perfectly finished look, you could add some decorative little covers to each end, and are available at any jewelry supply store. But really, no one will ever really notice if you don’t.
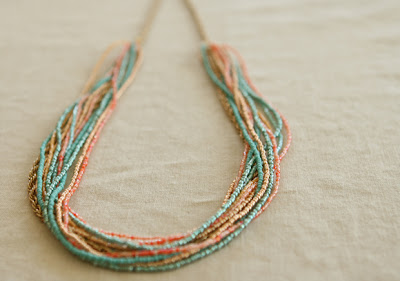
The total length of the necklace is 32″ and has 12 rows of seed beads that are approximately 20″ each. The total time it took me to complete the project was roughly 4-5 hours, and the total cost was less than $10. I used 5 different colors of beads, some of which I already had on hand and some I purchased. Any beginning crafter could easily complete this DIY in a weekend with just a bit of patience 🙂 Also, a note about the chain. If you don’t have one already on hand, you can of course buy chain at a craft store, but the least expensive solution is to pick one up at Forever 21 in their $1.50 section. This is where I got my chain from; it originally had a cute fishie attached, but fell off after a few weeks. What do you expect for $1.50 I guess? Anyhow, the chain is still in perfect condition though, so I’m glad I saved it and found a way to repurpose it!
I hope you enjoyed this one, and please let me know if you try it! To see a couple of recent jewelry DIY’s, you can see my friendship bracelet tutorial here and my threaded rhinestone bangle tutorial here.





Adan says
Hi outstanding website! Does running a blog such as this take a massve amount work?
I have absolutely no knowledge of coding however I was hoping to start mmy own blog in the near future.
Anyway, should you have any recommendations or techniques for new blog owners please share.
I undestand thiss is off subject however I simply wanted to ask.
Thank you!
cardio dual trainer manual pdf says
Woah! I’m really loving the template/theme of
this site. It’s simple, yet effective. A lot of times
it’s very hard to get that “perfect balance” between superb usability and visual appearance.
I must say that you’ve done a awesome job with this.
Also, the blog loads very quick for me on Safari.
Exceptional Blog!
the pe bible says
Hello! Would you mind if I share your blog with
my zynga group? There’s a lot of people that I think would really appreciate your content.
Please let me know. Thank you
p90x3 20 workouts says
Wow! This blog looks exactly like my old one! It’s on a entirely different
topic but it has pretty much the same page layout and design.
Outstanding choice of colors!
Donna says
I noticed that when you showed closing the jump ring you had one pair of pliers squeezing it shut. This is not the correct way. You should have two pairs of pliers and you apply gentle force in opposite directions to sort of twist it open, put what you want on the ring and then twist it back closed, moving the ends back and forth until you hear them click and they will spring back in place. Here’s a good, short youtube video. http://www.youtube.com/watch?v=n2OihVBhCes
I hope this helps!
Ruth P Kaplan-Kramer says
Thanks for writing about jump rings. I was going to say the same thing but you were years ahead of me. I just saw these directions today (2/17/2020). Pulling them apart instead of twisting them with 2 pliers just distorts the rings.
Rebecca @ My Girlish Whims says
This is so cute! But must have taken you forever!!! Oh well, jewelry is not for those without patience!!!
Penny says
Saw this and fell in love with it. Not sure what look I will ultimately achieve but this is on my list of things to make. May use different sized seed beads but have already acquired the chain and have a LOT of seed beads on hand. Thank you for a wonderful idea!
Gaetanina says
Genius!! Never would have thought of that trick! Definitely going to make one of my own.
Nancy Curtis says
Is The procedure for ending seed beads different than in your tutorial for the seeded bracelet? You indicated the lady at the bead store showed you how…………what is The proper way?
Just Jaime says
Beautiful! I had some seed beads even tinier than these that I tried to string. I made a lot of progress, but then they just sat in my drawer for years. I just recently donated them, but this makes me want to get some bigger ones and try out this necklace. It’s beautiful!
Laura says
Just another hint for people using seed beads- you can put the beads in a bowl and run the needle repeatedly through the beads as if you are scooping them. It can go quicker than trying to string them one at a time (if that makes sense). Love the design!
christina says
Love it! What size seed beads did you use?
kristen says
ok, so I LOVE this!!! I just don’t know if I have the patience… 😐 Maybe I’ll go bead shopping today…
Also, where did you get your top?
Andrea says
It’s about 2 years old from ann taylor loft 🙂
the Blah Blah Blahger says
LOVE this!!! Make me one, mkay?! 😉
Anne says
Thanks for the fun tutorial!